Often, we need to sub-divide dialogue to make it more readable. This is commonly achieved in the comics using merged balloons. Balloonist provides some helpful tools for merging balloons. We'll explore their use in this tutorial.
First, create two balloons using the word balloon tool. Position them diagonally.
Then, pick the selection tool. Drag a selection rectangle around both balloons, or hold down the shift key while clicking.
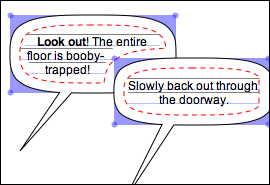
With both balloons now selected, pull down the Arrange menu and choose Merge.
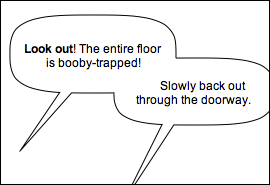
Now our balloons are merged, but they don't look so good. It turns out that very rectangular ovals don't make for attractive merged balloons.
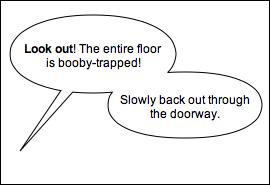
The problem can easily be remedied by making the ovals more ellipselike. For assistance with this task, consult the previous tutorial.
Selecting the newly-merged balloon will reveal its Properties Pane. You may want to adjust the margin slider to vary the yolk size and text layout.
You also may want to use the Object Hierarchy tree and the Clear command under the Edit Menu to remove any redundant stems.
As before, the product of our efforts is fully-editable in outside illustration software. If we select the merged balloon and copy it to the clipboard (Edit Menu), we can paste it into Adobe Illustrator with the following result:

Congratulations! You have completed the Merging Balloons tutorial.
< Previous Tutorial: Balloon Rectangularness | Balloonist Home Page